

Mod - Modrinth
The Lost Cities
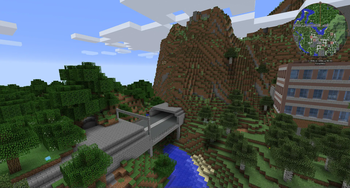
Allows the player to play in an old abandoned city instead of the normal overworld
Source-provided project description. FreeMinecraftMods keeps creator credit and adds separate compatibility and decision guidance below.
Project overview
# The Lost Cities The Lost Cities transforms Minecraft's Overworld into a vast, abandoned civilization. Explore ruined skyscrapers, apartment blocks, factories, roads, highways, bridges, tunnels, subway systems, parks, flooded areas, and underground rooms filled with loot and dangers. Cities are integrated into the normal terrain, so Lost Cities can be combined with other biome and terrain mods. Depending on the selected **profile**, the world can contain sprawling city regions, rare cities separated by wilderness, heavily damaged ruins, safer buildings, tall skylines, domed cities, or other specialized landscapes. ## Features - Large procedural cities with streets, buildings, parks, highways, bridges, railways, tunnels, and subways - Detailed interiors with loot, spawners, cellars, lighting, and extensive damage and decay options - Multiple built-in profiles for very different world-generation styles - An in-game configuration screen for selecting a profile and customizing generation - Support for biome and terrain-generation mods - Data-driven buildings, palettes, city styles, world styles, and other assets for modpack authors - Custom profiles for controlling city frequency, building height, damage, explosions, terrain, infrastructure, loot, and much more - Server-side-only operation, allowing vanilla clients to connect when no client-side Lost Cities features are required **Note: New Street/Highway layout was commissioned by TqLxQuanZ. Thanks for the support!** ## Current Version Documentation The documentation stored in the GitHub branch for your Minecraft version is the most accurate and up-to-date source. The [Lost Cities Wiki](https://wiki.mcjty.eu/mods/index.php?title=Lost_Cities) remains useful for older versions and general background, but it may describe legacy behavior that no longer applies. ### Minecraft 1.20.1 - [1.20.1 documentation](https://github.com/McJtyMods/LostCities/tree/1.20/docs) - [1.20.1 source branch](https://github.com/McJtyMods/LostCities/tree/1.20) ### Minecraft 1.21.1 - [1.21.1 documentation](https://github.com/McJtyMods/LostCities/tree/1.21_neo/docs) - [1.21.1 source branch](https://github.com/McJtyMods/LostCities/tree/1.21_neo) ### Minecraft 1.21.11 - [1.21.11 documentation](https://github.com/McJtyMods/LostCities/tree/1.21.11_neo/docs) - [1.21.11 source branch](https://github.com/McJtyMods/LostCities/tree/1.21.11_neo) ### Minecraft 26.1.2 - [26.1.2 documentation](https://github.com/McJtyMods/LostCities/tree/26.1.2_neo/docs) - [26.1.2 source branch](https://github.com/McJtyMods/LostCities/tree/26.1.2_neo) ## Setting Up a Server Choose the profile **before generating the world**. Changing the profile later affects only newly generated chunks and can create abrupt borders or an inconsistent world. If the server has already generated the intended world, stop it, make a backup, and use a new `level-name` or remove the old world before continuing. The profile name is the identifier shown in the Lost Cities profile selector, such as `default`, `nodamage`, or another installed profile. Names are case-sensitive. A custom profile must also be installed in the server's Lost Cities profile configuration before the world is created. ### Server Setup for 1.20.1 The safest way to configure a 1.20.1 server is to prepare the settings in single player: 1. Install the same Minecraft 1.20.1 mod loader, Lost Cities version, and world-generation mods on the client and server. 2. On the client, create a new single-player world. Open the Lost Cities configuration from the world-creation screen, enable Lost Cities, select the desired profile, and apply any custom settings. 3. Create the world once so Lost Cities writes its world-specific configuration. 4. Stop the dedicated server. 5. Copy `saves/ /serverconfig/lostcities-server.toml` from the client instance to `defaultconfigs/lostcities-server.toml` in the server directory. 6. Open the copied file and verify that `selectedProfile` contains the desired profile. Leave `selectedCustomJson` as generated if the profile was customized in the UI. 7. Start the server with a new world. The file in `defaultconfigs` is copied into the new world's `serverconfig` directory and Lost Cities generates the Overworld using that profile. For an existing server installation that has not generated its world yet, you can instead place a prepared `lostcities-server.toml` directly in `defaultconfigs`. Do not use the old `level-type=lostcities` setting on 1.20.1; Lost Cities is selected through its configuration. ### Server Setup for 1.21.1, 1.21.11, and 26.1.2 These versions use the regular server `config` directory instead of a per-world `serverconfig` file: 1. Install the matching NeoForge and Lost Cities versions on the server, together with any biome, terrain, or asset mods required by the pack. 2. Start the server once so the configuration files are created, wait for startup to finish, and then stop it. 3. Open `config/lostcities-server.toml` in the server directory. 4. In the `profiles` section, set `selectedProfile` to the desired profile name. For example: ```toml [profiles] selectedProfile = "default" selectedCustomJson = "" ``` 5. If you prepared customi
FreeMinecraftMods decision guide
This mod is most relevant to players looking for adventure, worldgen on fabric, forge, neoforge. Treat those labels as discovery hints, then verify the exact file and dependency list on the official project page.
The source record was updated on Sep 12, 2026, which is a recent freshness signal. A recent date does not guarantee support for every loader or Minecraft version, so still inspect the current file list.
What to verify before choosing a file
- Confirm that the file is published by the credited creator on the linked official source.
- Match the Minecraft version exactly instead of relying only on a broad category label.
- Read dependencies, incompatibilities, and changelog notes before updating an existing instance.
- Match the loader or server platform and its required version. Forge and NeoForge are not interchangeable.
- Back up worlds and configuration files before testing the project in a long-term save or public server.
Compatibility at a glance
Minecraft versions in this snapshot: 1.12.1, 1.12.2, 1.14.4, 1.15.2, 1.16.3, 1.16.4, 1.16.5, 1.18.1, 1.18.2, 1.19, 1.19.1, 1.19.2
Loaders and platforms: fabric, forge, neoforge
Before you install
Match the exact Minecraft version and loader, install every required dependency, and test in a separate profile before opening an important world. Keep a backup before changing a working mod list.
Source, licensing, and corrections
FreeMinecraftMods does not mirror the project files. Use the official source for downloads, release notes, dependencies, support, and licensing details. Project names, images, and creator-written descriptions remain the property of their respective owners.
How listings are reviewed | Report incorrect project information | Rights-holder and DMCA information
This source record is available for discovery, but it does not yet contain enough verified description, classification, image, freshness, or compatibility information to be indexed as a full editorial page. It is therefore marked noindex and is not eligible for advertising.